Tuesday 19 March 2019

Rolling Chassis - Pt 1

     Oh my, I thought, today is the day I start to put my Caferacer together. Armed with a little trepidation and a lot of enthusiasm, it began.
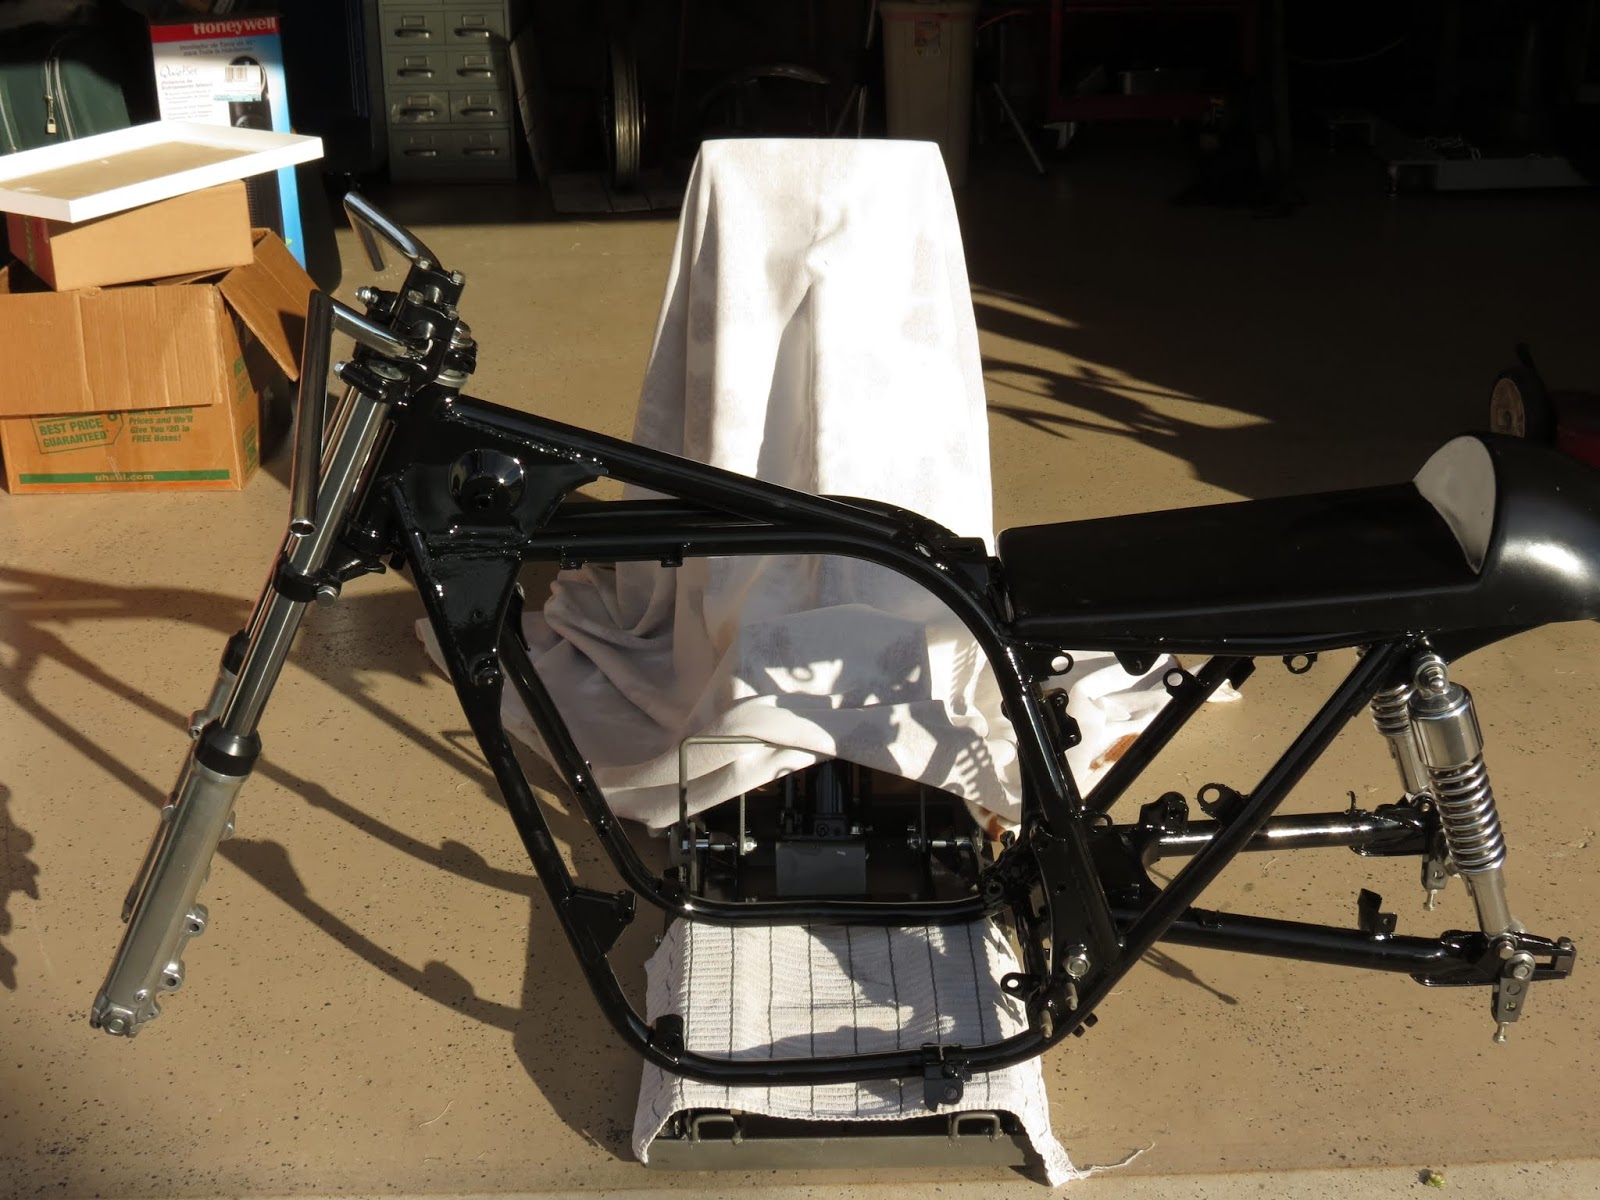
     First, all the initial parts were collated and inspected ready for assembly. Forks, yokes, handle bars, swing arm, side stand, front brakes, rear brakes and torque arm.  All parts cleaned, restored, repaired or replaced as needed. The assembly was straight forward, I wish i have done a time lapse of it. All in all I took about 2 hours greasing and assembling the KZ650C, transforming it for a compendium pf parts to my rolling chassis:


     As you can see, looking promising, the wood was just to protect the bottom of the side stand, and below a close up of the wheels and brakes. Alarmingly, I did not restore the rear calipers when I did the fronts, so I took a few hours to do those as well. The result is rather pleasing, oh, and i have put the dust cover on the rear calipers now too:

 I do like the black, polished aluminium and gunmetal combination on the wheels. I can't wait to get the rest of the build flowing and interval pictures.

     The next few days will be spent bolting on other items such as the clocks, grips etc. Have to wait for the money tree to blossom again before purchasing the brake lines. I do have the old ones, however, the bike will benefit from braided hoses all around, not to mention it will look better too.
     The to do list is then dominated by that unloved lump, 650cc of Kawasaki screaming 70's engine, not sure how far the strip is going to go. I am replacing a lot of gaskets, plugs and cleaning / polishing various engine casings. Painting a few in black too. Here is the video of the chassis, with my dulcet tones as a backing track, maybe i should learn a little video editing, and put a proper soundtrack to it.


I did like my dalliance with a video effect. I could get good at this...or tiresome, lol. Until later. TTFN

Friday 15 March 2019

The Tires (Tyres) are on the rims!

     Oh happy days and a big thank you to Cycle Gear of Orange Park, a very knowledgeable and friendly bunch. I initially went in for some fork oil, ah the forks. Just the forks, lol, a trial and triumph of mine, they look really good on the frame (see previous entries and, indeed, the next.). Got speaking to them, and they order and fit tires, if ordered through them - same prices online as google anywhere - they fit them for just $25.00 a rim.
     Now, my old Zed rims are not tubeless, so needed tubes as well. Remember i filled and hid the tire lock holes on the rear. I don't think they are needed for a road bike, trail - yes, road - no. So filled and finished the wheel was. And both looked good.
Now - the tires (tyres). I like Avon tires (tyres) for older bikes, don't ask why? Because i don't know, i just have an affinity for them. Any how, cycle gear very very helpful: tubes, tires (tyres), rim tape and fitting with lead if required was a comfortable $310.00, looking around, i feel local is best and reasonable too. The tires (tyres) I plumed for are the AM26 Roadriders.
     After one call, to inform me the tires (tyres) were in, the next day i got another "Mr Paul, can you confirm what way the front wheel goes on the bike, please?". After some thought (yes i got a headache) I told them the side with fitment for the speedometer drive was the left hand side of th bike, it is the bit that rattles a little.....
     Two hours later i collected the wheels, went to work. Got home later that night and looked at the wheels - "F*** me" - I thought, and possibly said - "The front is obviously on the wrong way around!" - the tread pattern was 180 degrees out from the rear!


     Now before i decried the guys that fitted the tire (tyre), of to the tinterwebs for a look and research. Of note, the rear says for rear use only, the front has the word 'UNIVERSAL' on the sticker. "Hmmmmm" I thought, "odd, best the research is a little more thorough". It turns out, and it took some getting my head around, that the tire (tyre) is turned 180 degrees if it is a universal fitment. Looking at the sidewall of the tire (tyre) reinforces this:


     The direction of rotation is opposite for the front and rear fitments! In brief - it is all about the forces applied to the tire (tyre). When on the back the forces are from the engine - acceleration. When on the front - the forces are from braking. All tires (tyres) are built to take forces one way, hence the flipping when on the rear or on the front!
     How I sighed a sigh of relief. So glad I didn't call and rant at Cycle Gear, who have done their job perfectly. I was almost the fud! Now the wheels are good and sexy and ready for final fitting. That is this weekends job. Until then, here are my wheels in all their completed glory:


     From a happy man, TTFN.

Thursday 7 March 2019

The side stand

     So, with everything parkerized and powder coated, a quick and easy fit I thought, the side stand......How wrong i was.
    The spring is a veritable bastard, after cleaning the rust and parking, of to my shiny frame i go. The stand fitted nicely, bolt looking fine against the glossy black frame. The I tried to stretch the spring, hmmmmm, its a strong one, and i did not want to use any leverage against my frame. I simply could not stretch it. What to do, of to you tube me thinks, get a hot tip, a bit like the distilled white vinegar procedure I used for the chain.
     Apparently, there is lots of advice, the best, that avoids levers and pry-bars involves 20 pennies and a little patience.

  As you can see, the spring is short, and very strong, maintaining fidelity to place the spring over the required lugs / retaining holes. The spring is about 2 inches short. The thing to do is get the pennies and insert them in every twist of the spring, thus lengthening it by the required amount:


     This stretches the spring enough to comfortably fit it without sweating, grunting or scratching my very nice powder-coated frame, ensure the stand is in the up position:


     Ahhhh, I hear your cry, how do you get them out without doing the very damage you are trying to avoid. 'Simple', is my retort - simply put the stand from its' raised position (the shorter of the stretched spring options) to down, this extends the spring and the pennies fall out.  I know, it's genius, simple and gentle to the paintwork.

     So,that is it for today, a problem solved, things learnt, saved by You-tube and some lateral thinking. Next up, the tires (tyres) and a complete rolling chassis, ready for the brakes. The engine is getting disassembled over the month too. Only part causing trepidation is the strip and rebuild of the carbs. More to follow, TTFN.


Wednesday 6 March 2019

Front Suspension assembly

     This is a joyous day, today i assembled the front forks, below is the before and after for the condition of the forks stripped down:
Before
After


Very shiny and ready for assembly. I must say, the $6.99 I spent at Harbor Freight on a polishing kit was a great investment. For this project, back home in Scotland I have a full mop kit, but for this job, the one shown was more than up to the task, and will also be sufficient to polish the engine cases.
     The units are assembled, a straight forward task, 20W oil used, 190 ml, as per the book. And then the units put into the head stock and frame, the rear units were also further cleaned and put into frame, it's starting to look like a motorcycle again:


     Other views below, I also cleaned all the nuts, bolts and springs for the sides stand and got busy with parkerizing again. It's looking good:


    The side stand is worthy of a short page of its own, and is my next entry. It was a tease to fit.