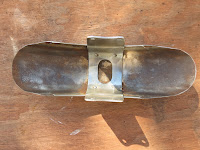
OK, I hear you, where has he been? Why no updates for a while. The simple answer work and more work making demands, can't wait to retire. Anyhow, back to the blog and my bike. Every day I do a little bit, if I can, the familiar words to the missus "Babe, just popping in the garage for 10 minutes...". Oh, how she knows me, her reply "See you in 3 hours then!".
The main focus of my attention this week has been the 'Bubba'd' head light. Yes - I could have purchased a new on, but that goes against what I am trying to achieve here. After a little searching in my garage, and the thought "I know it's here somewhere.", I found the remains of a fiberglass kit, with just enough of everything I need to refurb the head light. The surrounds have been powder coated by the very talented people at
Powdertechplus of Orange Park, and the cover is going to be my task.

As you can see, the hole in the back looks like it was cut with a 1930's tin opener. I set about sanding and then fiberglass over the hole and getting an enclosed cover to start with. Sanding with 220 grit and then 500 grit paper, to get it smooth and a good key for the fiberglass. I then formed the inside of the cover.

Having let the inside cure, I then formed the outer surface. As it turns out, it hasn't come out too badly, especially with my skill levels as a body work guru are average. The next stage came out thus:

And then to the out side, more sanding and priming. I did get a blister on my thumb (Dire Straights), sanding. More gloves needed. As I have found, most skills are learn-able, even if only at a basic level, but, I think, in this case it has been worthwhile, if only costing me time. It has saved the cost of a new headlight.
I then primed and sanded and primed the light housing to achieve a finish i was happy with, or as near as i could get to it. Perfection is a question of time, skill level and patience. I have some of these and perseverance. Once primed i elected to put my first coat of Gloss Black paint on, then, more after I realized than by design, cut the hole for the wiring in the cover. This i completed with a 2 inch hole drill, the kind that is a circular saw with a drill bit in it. Thus completing the initial fit. The hole was cut in pretty much the same place as the original 'Bubba Cut', and is so much cleaner and pleasing to the eye.

You can see how the hole cutter worked from the picture to the right. There was a little fraying of the glass inside the cover, but that sanded out with no issues. The rattle can finish is not as good as a professional job, but is so much improved over what was on the bike, and I have again salvaged a case for the dumpster into a very usable piece. It does, at this stage need a light 2000 grit wet and dry followed up with a gloss lacquer to finally finish it. That will be tomorrows job, once the paint has cured.
Paint cured, sanded and touched up. Lacquer applied, sanded and repeat. The cover is done. As a rattle can product, i am quite pleased with the overall result. Yes, it could be improved, but I am using my time as well as I can, learning and applying new skills as a task presents itself. Once my bike has been completed to it's initial stat, it becomes the embryonic state and will evolve. So cover completed, have looked for, and ordered the indicators, eBay specials. Will publish more on the completed front end soon For now, here is the finished cover picture, will assemble the headlight once indicators have arrived.


