Saturday 1 September 2018

Cutting the frame and fitting the seat unit.

     Posting today after a long while. Have had a few things going on, so my bike has taken the hit. Now settled at my new home.
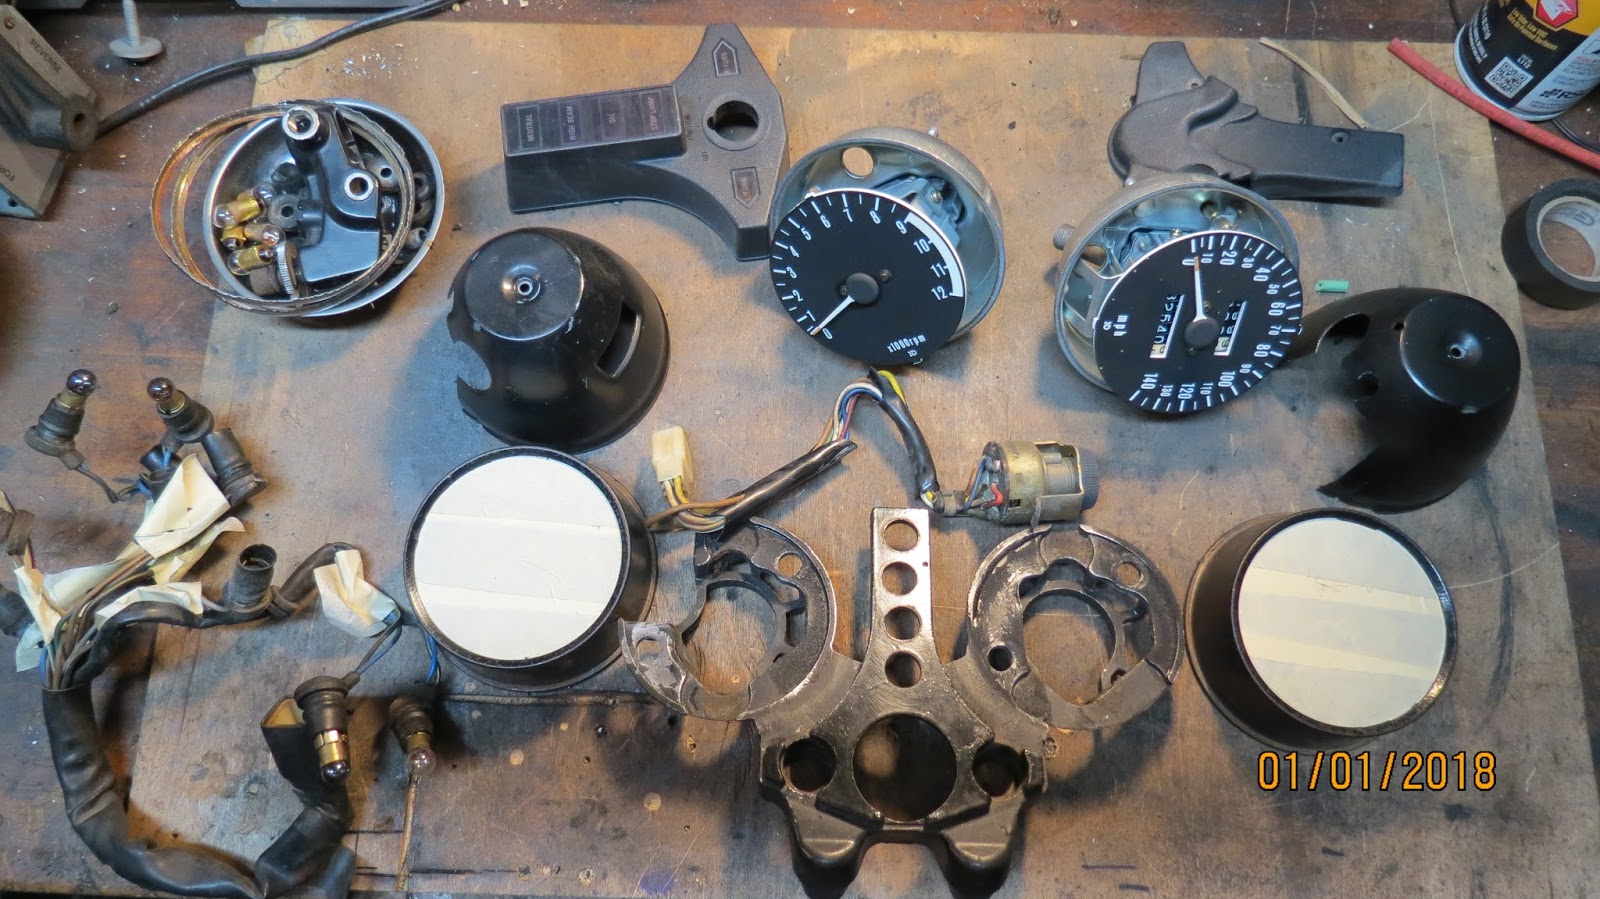
     I removed the handle bares and steering from the frame. The bearings are worn and will need replacing, it was very notchy.
     The seat unit decision took a lot of time and thought, Possibly too much thinking, sometimes with a PBR in hand. Eventually, after much web browsing, i settled with Dime City Cycles, and browsed the selection. I settled on the THRUXTON Fibre Glass seat pan and the all in one PAD that goes with it. It is the right length and width, but the frame will need a trim.....out with the angle grinder.
     Measuring 6 times, i cut only 4, below are the pictures for the before and after of the trimming. As you can see from the marked before photo, there was about 3lbs of metal to trim:


The resulting cuts and a little grinding left these parts in a zip-lock, just in case... The rubber bushing may be used to support / cushion the seat unit.


     So, the frame is cut:


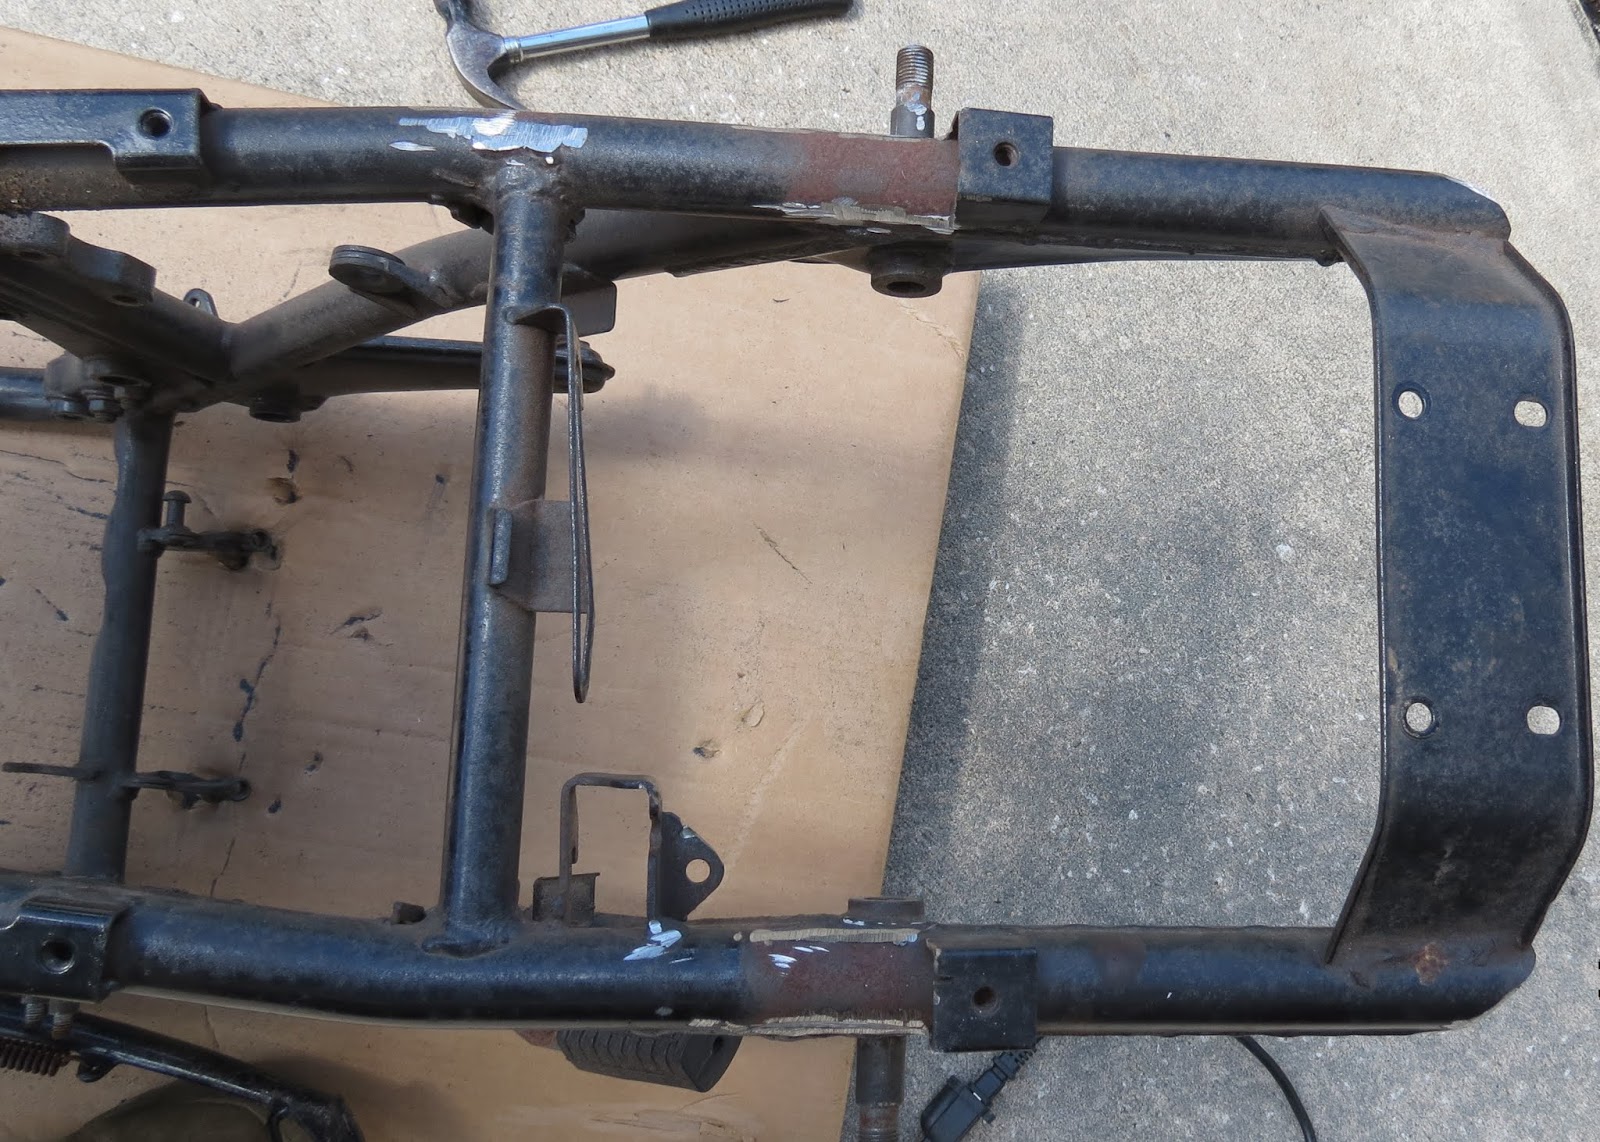
     It took about an hour of cutting and shaping to get the fit, but as you can see, not too bad. My only bug bear is the seat sitting a little too high on the frame. If i want it lower there are a couple more square lugs to cut off, the problem being is that:

     If I lower the seat unit any more i will loos the lines between unit and tank, however, it will cover a little more of the frame. I think the line is more important, but will mull it over. You can see the initial results below:


     The seat pan fits nicely, the pad is about an inch short, but i intend to have it upholstered in leather with a diamond pattern in the stitching, will use this opportunity to lengthen the pad a little to fit it a plush fit.
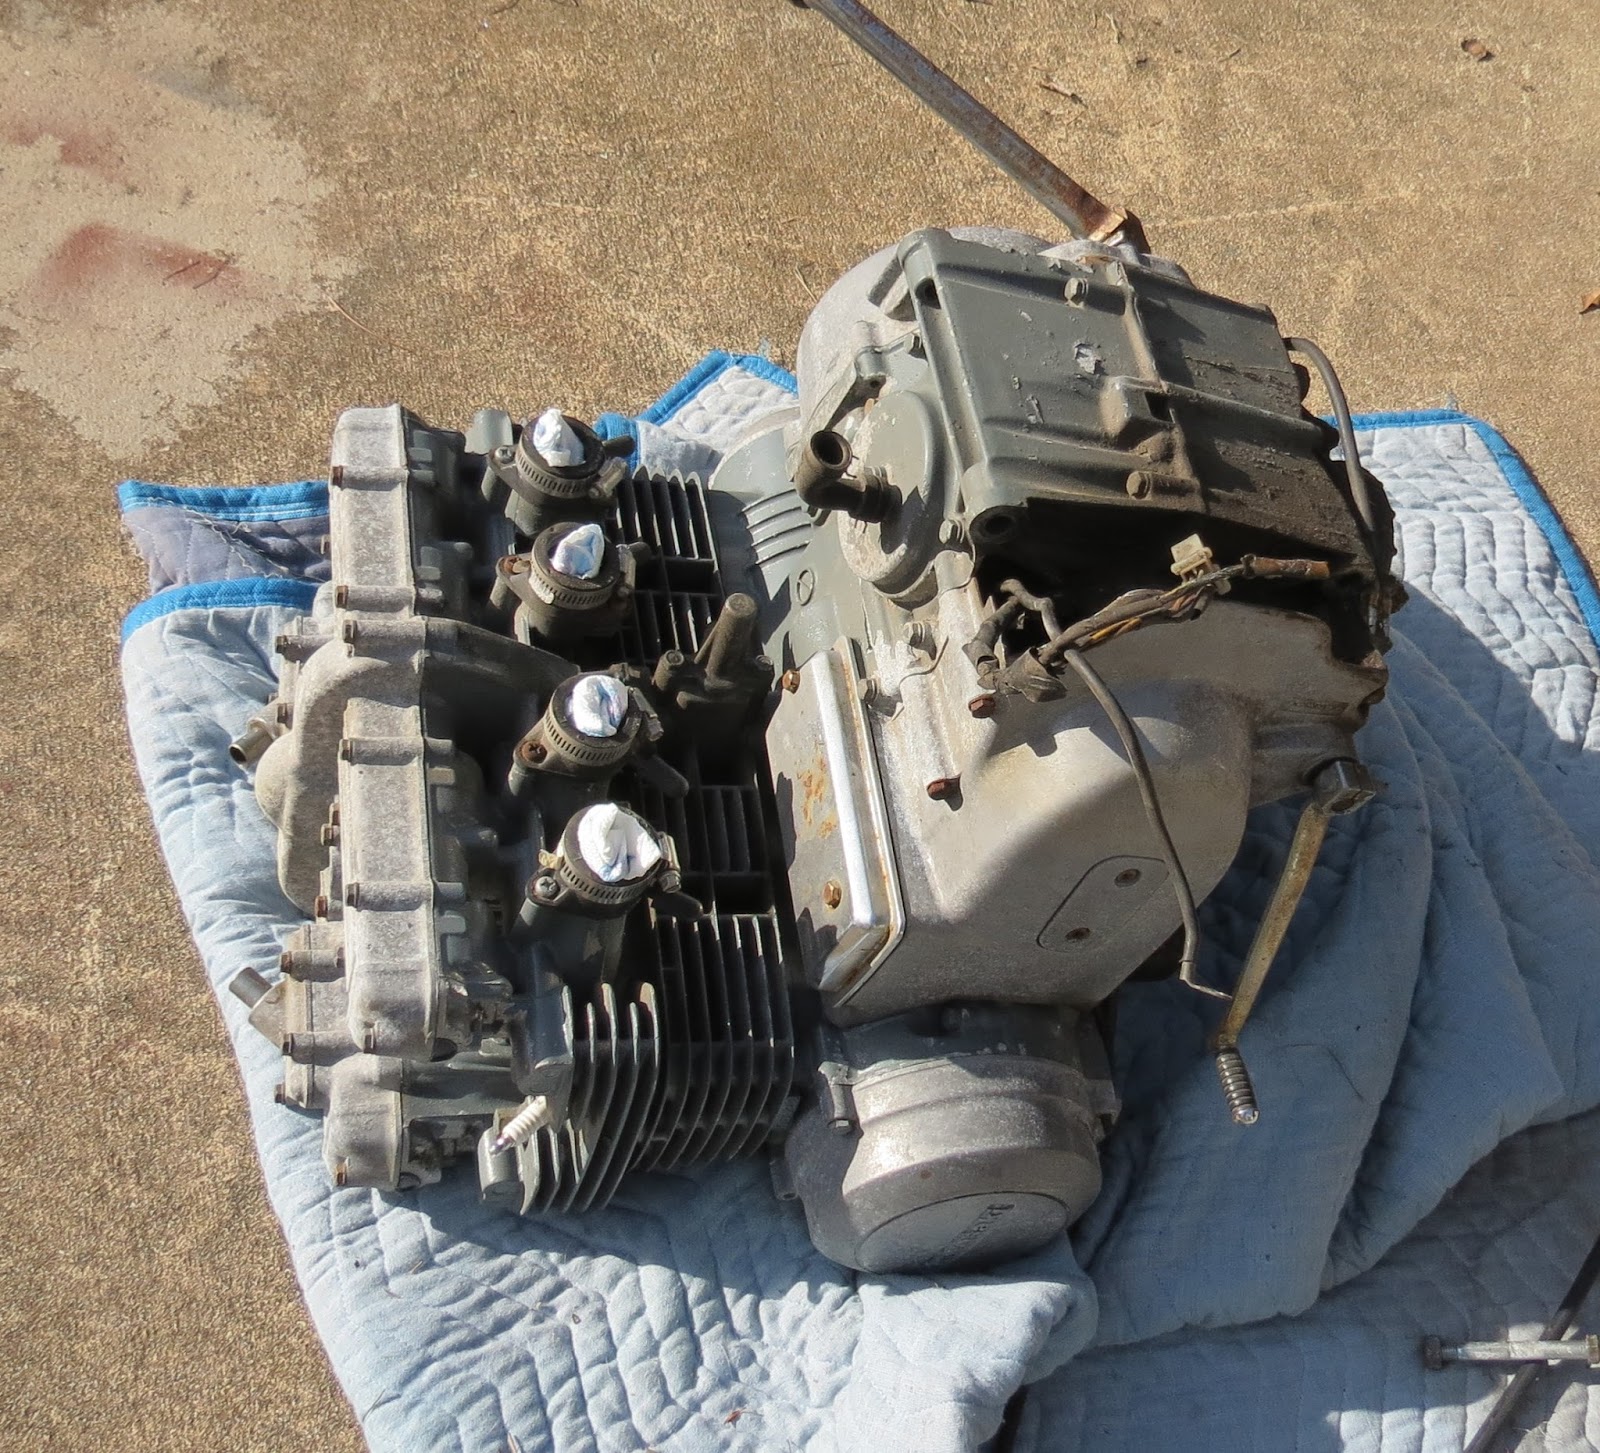
     So, that's it for today, juices have been flowed and interest reignited for my project. Now to look at the foot pg requirements, a little frame trimming and dressing before the powder coating. Gloss black is the decision. 

Saturday 28 April 2018

The tear down is complete!

     So today is a good day, I took the opportunity to steal a few hours this afternoon to complete the removal of the front and rear end of the bike. As with all other parts on the kwaka, it was relatively easy, once a liberal amount of WD40 and elbow grease was applied to the rusting bolts, including the now expected home depot specials.
     
The tools required today were;

          1. Ratchet Wrench
          2. 13mm, 14mm, 17mm, 24mm and 27mm sockets and wrenches
          3. WD 40
          4. Soft Faced mallet
          5. Bike stand - this is an unexpected quality item from Harbor Freight.

     The work began:

As can be seen, the cush dive rubbers are in new condition, ans is the rear sprocket and there was new grease in there, I think a sprocket may have been changed. I think i will just give the wheels a clean and see what state they are in. The quality Chinese tyres will, unfortunately, have to go. The rear caliper will need an overhaul, same as the front got.

     To my delight, the front and rear discs are not only identical, but are like new, hardly worn at all.
     The most problematical part of this phase was the removal of the rear spindle, it was very very secure, and required a little percussion adjustment. Not thinking i applied the required force with a steel faced hammer and no soft plat, thus i did mushroom the spindle end a little, it is not, in any way un-serviceable, but will require a little love.

Not much work required here, as i have said, i will clean the wheels and see what state they are in before deciding whether to gt them powder coated along with the rest of the frame.

I have decided, at the time of typing that my colours will be black and red, with gun-metal accents.

The tank is going to get indents, I am yet to decide upon using body work curved hammer to indent, or cut and weld the tank, I am leaning towards the former.


     After the wheels came out, the suspension proved refreshingly easy, 4 bolts at the front and four at the rear was all that was required and out the twin shocks came, as did the forks.  ]The fork lowers will need painting / coating in black or gun-metal. The rear shocks are destined for teh trash. I have my eye on a Chinese rip-off of some Hagons, so i am going to invest. See what happens. The front forks are in good condition, that said, i am going to refresh the fork oil and put progressive springs in too.


     Now the expense and fun begins. The purchase of parts and the rebuild.

Sunday 1 April 2018

Engine is out!!

     Finally, after much dis-assembly, and the help from a holidaying brother-in-law, the engine is out of the frame! It was an east task, just remember to take the chain off first - find the split link, and remove it, then, the rusty chain came out. The chain just has surface rust and was surprisingly free in movement.
     For the removal you will need a 13mm, 14mm and 17mm socket and accompanying wrench. If you have a hoist the engine is tricky but can be maneuvered out of the frame, but in this case two is better than one. A little jiggling and the lump was out, weighing in at about 80lbs, including the gearbox.


     The frame is now accessible. Front and back end off next. Plan is to buy my cafe seat and trim the frame appropriately, everything rear of the shock mounts is going, as is the rear foot peg supports. Will have to devise a simple exhaust mount, going for an up-swept look, undecided about single or twin pipes.


     I did invest (not sure if this is the right word for a Harbor Freight tool), in a motorcycle lift . With the 25% coupon it only cost me approximately $72.00. A bargain and it seems robust enough for hobby use. Assembly was easy and it can lift the KZ 650 with ease, it is rated to 1500lbs, but would not want to go there!
     Next, the front and rear are out and up for a refurb, cut the frame and fit the seat. Still not sure which way I am going with the electrics and battery......
     

Monday 5 February 2018

Refurbished binnacle and more of the Home Depot DIY parts off.

     The sun is shinning and i thought to steal a couple of hours on the bike this afternoon.

     The new  refurbished binnacle looks good, sprayed in metallic gunmetal paint., glass and all electrical contacts have been cleaned. As you can see in the pictures, it is a lot better than it was, if it doesn't look the part on the finished bike then i will procure something retro from the old interweb.

     Thus, today i decided to remove the rear brake system, pedals and the wiring loom. The loom worries me a little as i am not sure whether i am going to update the ignition or keep it old skool (and temperamental / unreliable). That said the minimalist electrics and kick start does appeal to me. More reading is needed and a decision is to be made.


     Not only did the loom come off, and all an-sundry, i removed the carbs. The rubbers were perished to the other side of pre-history and  they look like shite, think a complete strip and clean is totally needed. Oh well, may have to buy a ultra sonic cleaner.

    My gorgeous and very understanding wife bought me a set of cafe bars and mirrors for Xmas, the bars look a treat, as you can see. Am loving my project, just the lump to remove. Then the front and rear wheels and suspension. After that the really fun stuff starts. The powder coating and slow reconstitution of a cafe racer.

     The engine and carb strip and assembly is going to be revealing and a challenge, although the electrics are the part that scare me, I hate motorcycle electrics.

Monday 1 January 2018

The Binnacle - 40 year old bulbs and foam.

     The new year has seen the arrival of positively Scottish weather here in Florida!
Continuing with the take down (along with my 2 other projects - a Wells Index milling machine conversion to 3 phase with a DRO, K98 restoration) time and space are at a premium.
     The clocks were a nice little sub-project, going to strip them, clean and then paint the metalwork in the same paint as my brakes and bar mounts. Oh - on that, my gorgeous wife has bought me some most excellent cafe racer bars, grips and mirrors for Christmas, she really gets me! Pictures will follow when I restore the clocks and assemble.

     So the rev counter had a spiders web / nest under the glass. A total disassembly and clean was in order. The problem is that these clocks are not designed to be opened. they are in two halves, sealed together with a rubber gasket and a steel crimped ring. The arr is to slowly and diligently pry the ring up, a little at a time using a small screw driver.


A little persuasion is needed, but be careful, the steel ring is very malleable and can be easily damaged. Once of, the instruments come apart easily. Glass cleaned and the steel work given a wire wool scrub, to aid paint adhesion.

     The next challenge was the mounting bracket itself, along with the indicator and light cluster. The sound application of a little WD40 and tentative use of a metric 8 mm socket wrench had the desired effect, and the rest came apart without a hitch. I labelled each of the lights on the loom and separated it from the binnacle. Some of the bulbs were blown, and the glass bulb had separated from two of the bulbs, so a trip to the auto store is also on the cards. Once stripped the prep for paint was completed, and now i am awaiting a dry day to paint before re-assembly.


All of the binnacle disassembled, masked ready for paint.

.
     Paining completed, the results are not to shabby. The only thing i am not to keen on are the chrome / steel bands, i had to re crimp as best i could using smooth pliers. They are still way better than prior to my attentions. If i don't like them once functional on the bike, i can always source some retro dials from the world wide web.


Off into a box until re-assembly. Am quite happy with them.